Serverless VSTS Build Agents with Azure Container Instances 🔗
Every software project is different, and may rely on wildly different dependencies at build time. Package managers make this go away most of the time, but sometimes there are things you need installed at the OS level to build or run.
Visual Studio Team Services (VSTS) is a great tool that can run your automated builds and offers Hosted Agents where there’s quite a bit of useful tooling already installed (check the Linux Dockerfile here).
Sometimes, the Hosted Agents won’t have the software you need, or you may want a particularly beefy build host. VSTS also lets you bring your own agent, where you can do whatever you want. This is great, but now you need to maintain (read: pay for) a VM that’s ready to accept jobs.
By taking advantage of Azure Container Instances, you can spin up a build agent on-demand that contains whatever you want, while only paying for the seconds of compute and memory time you actually use.
If you’re here, you probably like code! The example repo to follow along is https://github.com/noelbundick/vsts-aci-build-agent
Overview 🔗
The zeroth step, not covered in this post, is that I’ve written some code and want to build it. I’ve pushed it to GitHub. On build, VSTS picks up my commit & launches an automated build. This is where it gets interesting. Here’s a big picture of what I’ve put together.
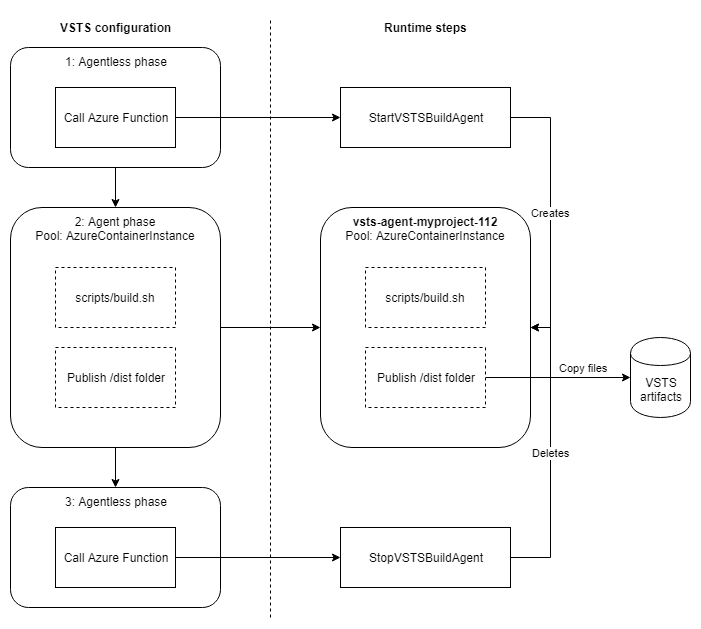
In an Agentless phase, invoke an Azure Function that will create an on-demand build agent via Azure Container Instances in a custom agent pool named
AzureContainerInstance.In an Agent phase, I run my build steps, capture test results, and copy the artifacts I care about back to the VSTS service. These steps target an agent pool named
AzureContainerInstance, and are matched up with the container created in step 1.In another Agentless phase, call a second Azure Function to delete the build agent.
Note: For simplicity, I’m making an implicit assumption that I don’t have multiple builds going on at the same time here. You’ll want to tweak the process as needed to support concurrent builds.
Defining the Build Agent 🔗
Before we dive into VSTS configuration, we need to define what we want in the build agent. The Hosted Linux agent is actually pretty awesome, but it’s also pretty huge. To validate, I’m using something extremely stripped down. Debian + git + Python + VSTS agent is all I need today.
FROM debian:stretch

ARG VSTS_VERSION=2.131.0

WORKDIR /agent
RUN useradd vsts

RUN apt-get update \
  && apt-get install -y git python python-setuptools python-pip \
  && rm -rf /var/lib/apt/lists/* \
  && pip install wheel

ADD https://vstsagentpackage.azureedge.net/agent/$VSTS_VERSION/vsts-agent-linux-x64-$VSTS_VERSION.tar.gz .
RUN tar xzf vsts-agent-linux-x64-$VSTS_VERSION.tar.gz \
  && ./bin/installdependencies.sh \
  && chown -R vsts:vsts /agent

USER vsts

ENTRYPOINT ["/bin/bash", "-c", "./config.sh --unattended --replace && ./run.sh"]
I’ve built & pushed this sample to acanthamoeba/vsts-build-agent on Docker Hub.
Creating an Agent Pool 🔗
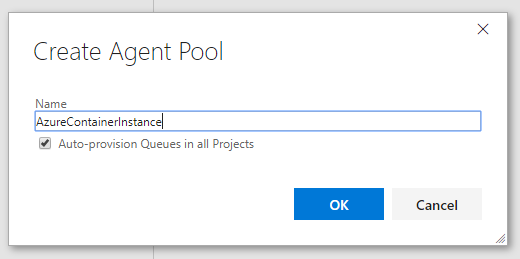
I’ve also decided to put all my dynamically created build agents in their own pool. This step is optional, but I wanted to keep them all grouped together. To create a new pool:
Go to
Settings -> Agent QueuesClick
Manage poolsin the left menuClick
New pool...Give it a name & hit
OK
Yak Shaving with Azure Functions 🔗
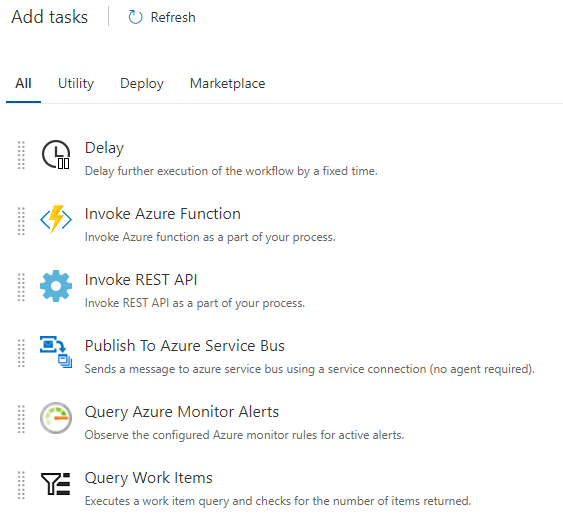
VSTS Agentless phases are very limited, which makes sense! You’re getting a tiny bit of compute for free there, so what you really get is the ability to invoke something else that will do the real work. At the time of this post, VSTS doesn’t support invoking an Azure Container Instance or ARM call directly, but it does support Azure Functions! That means with a tiny bit of extra work, I can do whatever I want!
I’ve set up an Azure Functions app with two functions - StartVSTSBuildAgent and StopVSTSBuildAgent. These functions use Application Settings to know which VSTS instance to connect to, and they use a Service Principal to perform operations in my Subscription. This lets me lock down my function, so that if it were to be compromised in any way, I could quickly revoke access & rotate my secrets.
StartVSTSBuildAgent 🔗
I used .NET for my function because it’s easy & the Azure SDK’s are always up-to-date. I already had some other C# functions, so there was no need for anything different. The important code is below
await _azure.ContainerGroups.Define(agentName)
  .WithRegion(resourceGroup.RegionName)
  .WithExistingResourceGroup(resourceGroup)
  .WithLinux()
  .WithPublicImageRegistryOnly()
  .WithoutVolume()
  .DefineContainerInstance(agentName)
      .WithImage("acanthamoeba/vsts-build-agent")
      .WithoutPorts()
      .WithEnvironmentVariables(env)
      .Attach()
  .CreateAsync();
You can find the full source in the noelbundick/vsts-aci-build-agent repo
StopVSTSBuildAgent 🔗
Likewise, the stop function, which deletes the container instance is driven by the following line
await _azure.ContainerGroups.DeleteByResourceGroupAsync("vsts", agentName);
Configuring VSTS Builds 🔗
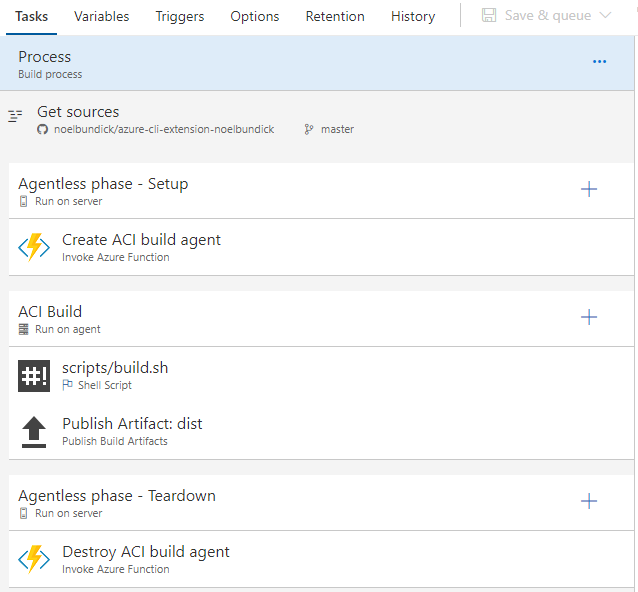
My VSTS build process looks like the following screenshot. Let’s walk through each component.
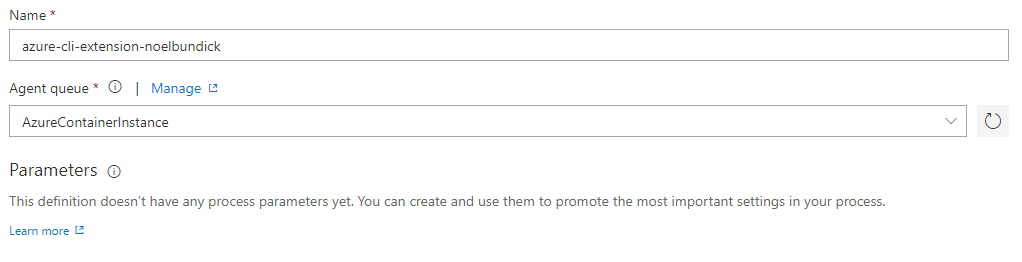
Process 🔗
I want all my Agent phases to run inside my containers, so I’ve specified the Agent queue
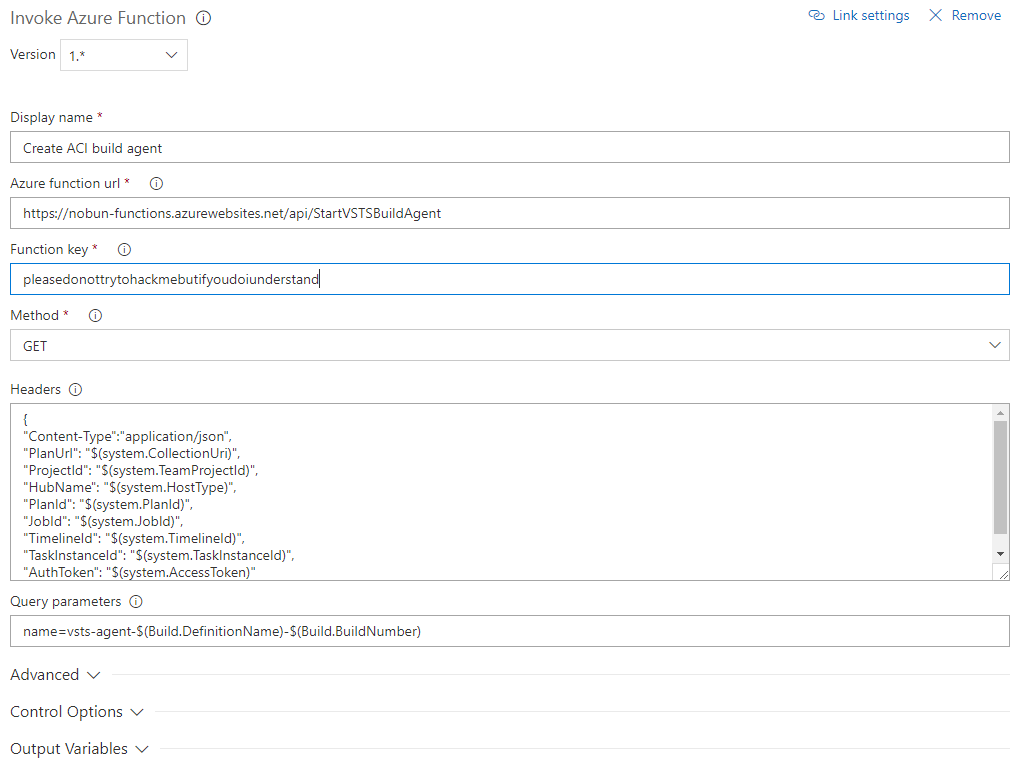
Agentless phase - Setup 🔗
This is where I create my build agent. Setting this up was pretty straightforward, though I did play around a bit with the name. I wanted to be able to look at a container instance and identify which app & build number it was for. My simple convention is vsts-agent-<APP>-<BUILD>, as shown in the screenshot below.
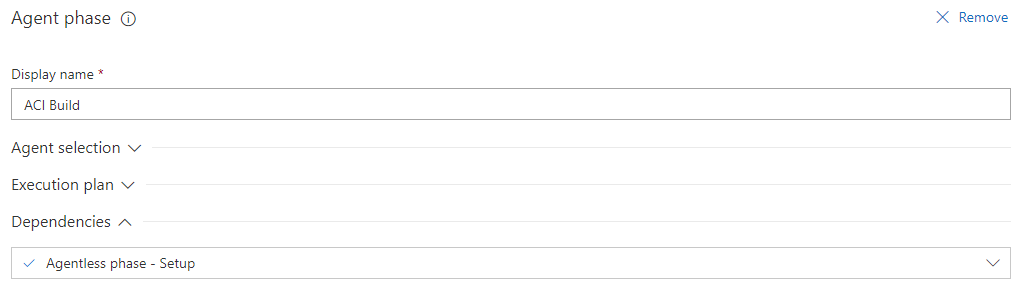
ACI Build 🔗
Your app will be built differently than mine, so I’m not going to dive into too much here. These steps run on my selected agent pool (AzureContainerInstance), inherited from the top-level Process. This will be just like using a Hosted Agent, or some other custom pool you may be accustomed to.
One item I do need to call out, however, is that this phase has a dependency on the previous phase. In practice, this one isn’t strictly necessary - VSTS will hold the job & assign it once an agent is available. However, I ran into a case while testing where the delete phase ran before the build phase… my container had been created & deleted before a build ever had a chance to run - leaving it stuck.
Don’t be like me - explicitly define your dependencies!
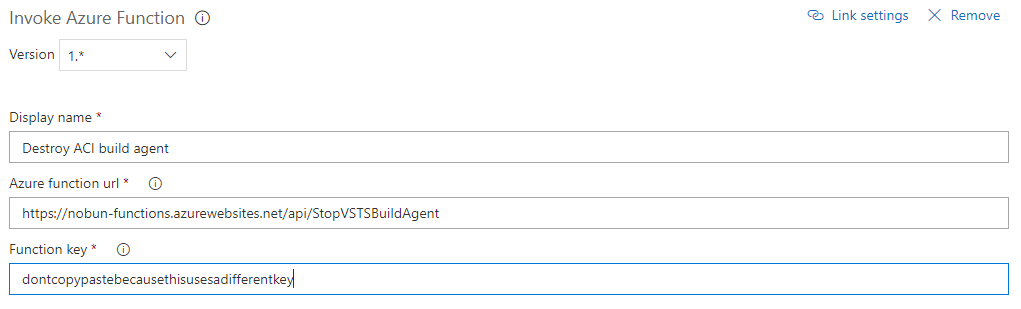
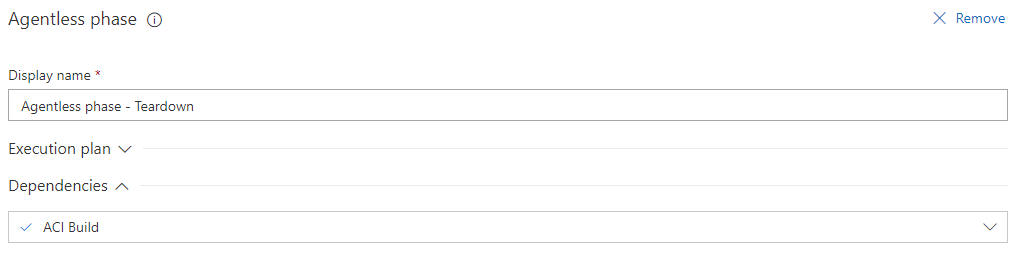
Agentless phase - Teardown 🔗
This is conceptually identical to the setup phase. A couple of things to note in the final step
First, functions have different keys, so don’t this is not the place to exercise your copypasta skills and walk away.
Second, you did remember my note about dependencies, right? This one is more important than the first
Summary 🔗
That was pretty painless! A little bit of hassle, but that’s just of the nature of CI/CD configuration in my experience. I’m going back and forth on where I’d use this over just including a Dockerfile & using a Hosted agent pool. If you know your build needs a lot of dedicated CPU & memory in a funky environment, this might be a neat tool to keep in your belt.
You should be able to tweak this process to use with Windows containers if you need a dynamic Windows pool as well. Keep an eye out for the differences between Windows Server 2016, version 1709, etc. and what’s supported by Azure Container Instances. Ex: if you need to execute on Insider builds of Windows Server, this solution probably isn’t for you.
Finally, I’m not even close to the first one to think of or implement VSTS agents on Azure Container Instances. Do a quick search, and you’ll find a ton of great ideas & posts out there. Hope you’ve found this one useful!