With the latest round of updates released at Build 2017, Service Fabric has become more powerful than ever, and getting started is now a breeze. This quick guide will help you get started with a secure Service Fabric cluster that you can start tinkering with.
Prerequisites 🔗
- Azure subscription
- Azure PowerShell
- TL;DR install: run
Install-Module AzureRMin a PowerShell window
- TL;DR install: run
Creating a cluster 🔗
Get started with a new PowerShell window. Running the following commands will automatically create all the required Azure resources on your behalf and will output a ton of great info about your newly created cluster. This cmdlet is doing a lot of work behind the scenes, so expect this to take a few minutes to complete.
# First, we need to login to an Azure subscription
Login-AzureRmAccount

# Create a SecureString to be used for our virtual machines
# We'll use the same password to protect our PFX
$password = ConvertTo-SecureString "Password1234!" -AsPlainText -Force

# Create the cluster and drop the KeyVault-generated certificate in a folder
New-AzureRmServiceFabricCluster -ResourceGroupName trash123 -Location southcentralus -VmPassword $password -CertificateOutputFolder C:\temp -CertificatePassword $password
Example output 🔗
Here’s an example of the output generated. Hold onto your output to be used in a later step.
VmUserName   : adminuser
Certificates : Primary key vault and certificate detail:
                KeyVaultId : /subscriptions/6c1f4f3b-f65f-4667-8f9e-b9c48e09cd6b/resourceGroups/trash123/providers/Microsoft.KeyVault/vaults/trash123
                KeyVaultName : trash123
                KeyVaultCertificateId : https://trash123.vault.azure.net:443/certificates/trash12320170512104014/f31c6346957349999f0958d1750c2745
                SecretIdentifier : https://trash123.vault.azure.net:443/secrets/trash12320170512104014/f31c6346957349999f0958d1750c2745
                Certificate: :
                    SubjectName : CN=trash123.southcentralus.cloudapp.azure.com
                    IssuerName : CN=trash123.southcentralus.cloudapp.azure.com
                    NotBefore : 5/12/2017 10:30:24 AM
                    NotAfter : 5/12/2018 10:40:24 AM
                CertificateThumbprint : DD684A5482B40911BDC3FFE137B96005FFB57072
                CertificateSavedLocalPath : C:\temp\trash12320170512104014.pfx

Deployment   : Name : AzurePSDeployment-0512104059
               Id : /subscriptions/6c1f4f3b-f65f-4667-8f9e-b9c48e09cd6b/resourceGroups/trash123/providers/Microsoft.Resources/deployments/AzurePSDeployment-0512104059
               CorrelationId : b0ca0092-a7be-4909-a62d-e409a2ba826e
               Mode : Incremental
               ProvisioningState : Succeeded
               Timestamp : 5/12/2017 5:49:25 PM

Cluster      : AvailableClusterVersions :
                   CodeVersion : 5.6.204.9494
                   SupportExpiryUtc : 12/31/9999 23:59:59
                   Environment : Windows
               ClusterId : 00b7f73b-197e-43e7-ac78-11ea9063ed79
               ClusterState : Deploying
               ClusterEndpoint : https://southcentralus.servicefabric.azure.com/runtime/clusters/00b7f73b-197e-43e7-ac78-11ea9063ed79
               ClusterCodeVersion : 5.6.204.9494
                   Thumbprint : DD684A5482B40911BDC3FFE137B96005FFB57072
                   ThumbprintSecondary :
                   X509StoreName : My
               ReliabilityLevel : Silver
               UpgradeMode : Automatic
               ClientCertificateThumbprints :
               ClientCertificateCommonNames :
               FabricSettings :
                   Name : Security
                   Parameters :
                       Name : ClusterProtectionLevel
                       Value : EncryptAndSign
               ReverseProxyCertificate :
               ManagementEndpoint : https://trash123.southcentralus.cloudapp.azure.com:19080
               NodeTypes :
                   Name : nt1vm
                   PlacementProperties :
                   Capacities :
                   ClientConnectionEndpointPort : 19000
                   HttpGatewayEndpointPort : 19080
                   DurabilityLevel : Bronze
                   ApplicationPorts : Microsoft.Azure.Management.ServiceFabric.Models.EndpointRangeDescription
                   EphemeralPorts : Microsoft.Azure.Management.ServiceFabric.Models.EndpointRangeDescription
                   IsPrimary : True
                   VmInstanceCount : 5
                   ReverseProxyEndpointPort :
               AzureActiveDirectory :
               ProvisioningState : Succeeded
               VmImage : Windows
                   StorageAccountName : 5ju2pr5depdg42
                   ProtectedAccountKeyName : StorageAccountKey1
                   BlobEndpoint : https://5ju2pr5depdg42.blob.core.windows.net/
                   QueueEndpoint : https://5ju2pr5depdg42.queue.core.windows.net/
                   TableEndpoint : https://5ju2pr5depdg42.table.core.windows.net/
                   OverrideUserUpgradePolicy : False
                   ForceRestart : False
                   UpgradeReplicaSetCheckTimeout : 10675199.02:48:05.4775807
                   HealthCheckWaitDuration : 00:05:00
                   HealthCheckStableDuration : 00:05:00
                   HealthCheckRetryTimeout : 00:45:00
                   UpgradeTimeout : 12:00:00
                   UpgradeDomainTimeout : 02:00:00
                   HealthPolicy : Microsoft.Azure.Management.ServiceFabric.Models.ClusterHealthPolicy
                   DeltaHealthPolicy : Microsoft.Azure.Management.ServiceFabric.Models.ClusterUpgradeDeltaHealthPolicy
               Id : /subscriptions/6c1f4f3b-f65f-4667-8f9e-b9c48e09cd6b/resourcegroups/trash123/providers/Microsoft.ServiceFabric/clusters/trash123
               Name : trash123
               Type : Microsoft.ServiceFabric/clusters
               Location : southcentralus
               Tags :
                   resourceType : Service Fabric
                   clusterName : trash123
Viewing in the portal 🔗
Let’s take a quick trip to the Azure Portal and look at what was created. I’m going to use the search bar at the top of the portal to look at my newly created Resource Group

Selecting the resource group, you’ll see something like the following
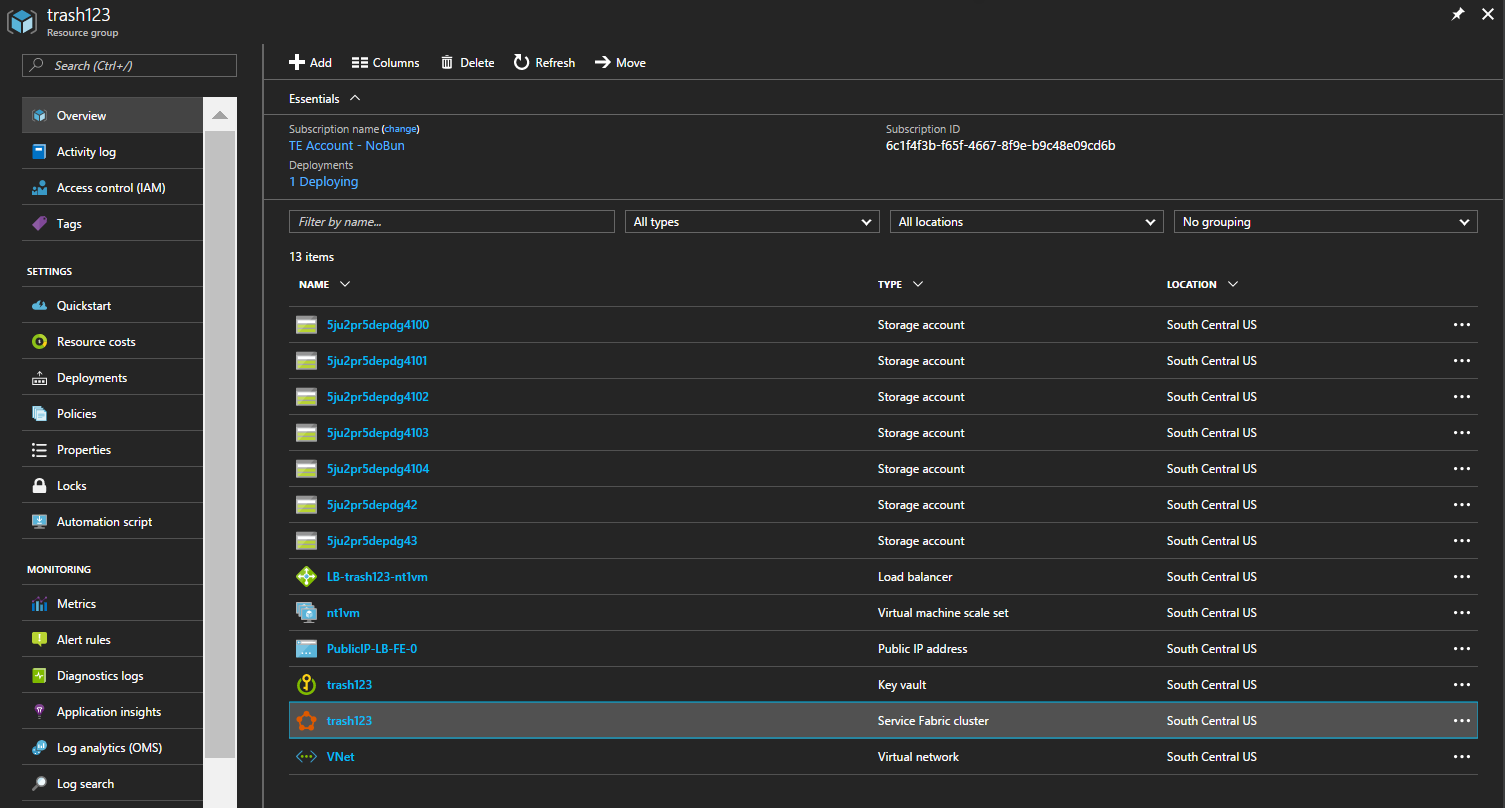
That’s a lot going on to support your cluster. You’ve got a Key Vault, a Virtual Network, a Load Balancer with a public IP, several Storage Accounts, a VM Scale Set, and finally, your Service Fabric cluster itself. Not bad for a 1-line command!
Select the cluster resource to see some more details
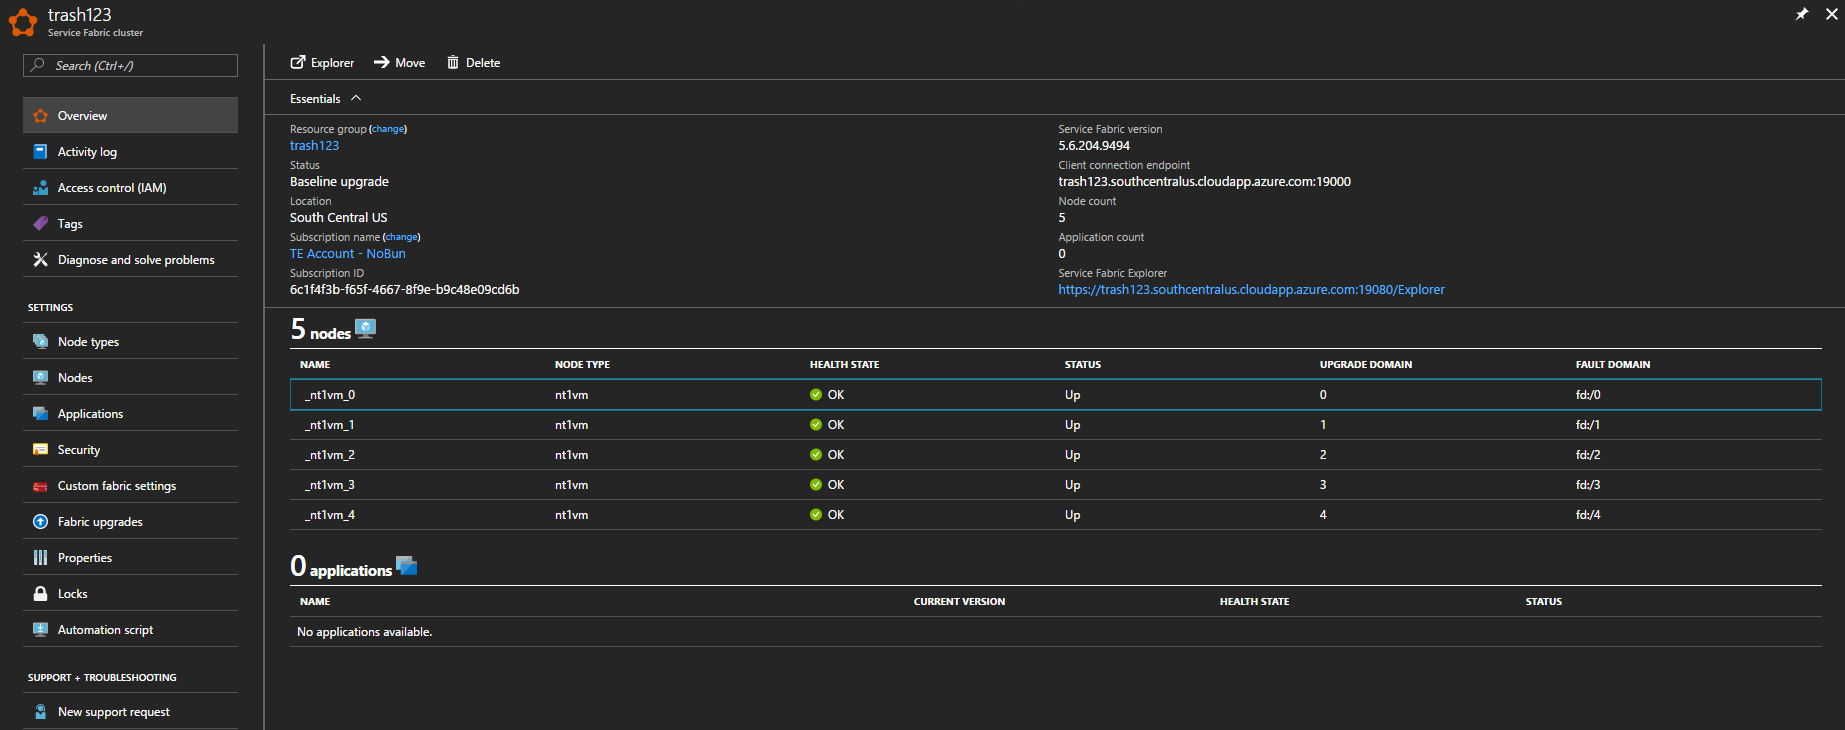
5 VM’s and a couple of endpoints. So far, so good! In the past it was pretty easy to get to this point with an Unsecure cluster, but then anyone on the Internet could access your cluster. The good news is that the new Service Fabric cmdlets are secure by default.
Click into Security in the left menu
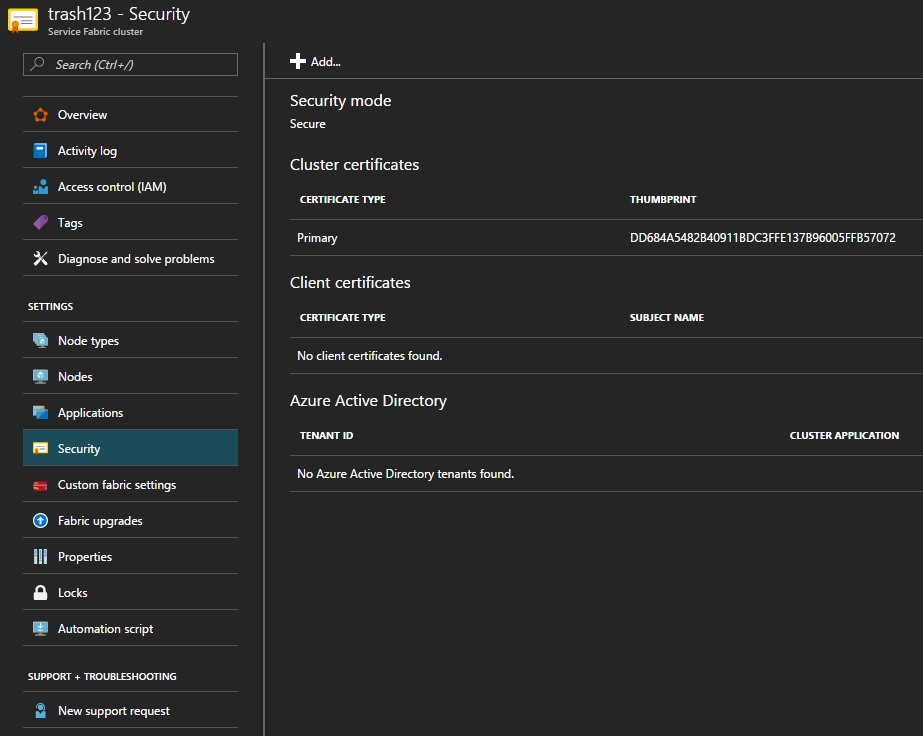
Great! There’s a Primary certificate. This cert will be used to grant access to inspect, deploy, and remove applications on the cluster.
Accessing the cluster 🔗
It’s time to dive in deeper and look at the services running on your cluster. To do that, you’ll need to install the aforementioned primary certificate to your local machine so that your browser can use it to authenticate to the HTTP managmement endpoint.
Installing the cluster certificate 🔗
Because you passed in the CertificateOutputFolder switch earlier, the cmdlet downloaded it from Key Vault and saved it as a local PFX file. You’ll see the specific file in the cmdlet output in the CertificateSavedLocalPath property. Use that file to import to your CurrentUser\My certificate store with the following command
Import-PfxCertificate -FilePath C:\temp\trash12320170512104014.pfx -Password $password -CertStoreLocation Cert:\CurrentUser\My -Exportable
Using the HTTP management endpoint 🔗
Now it’s time to access Service Fabric Explorer running on your cluster. Get your cluster management endpoint either from the Azure Portal, or from the ManagementEndpoint property in the cmdlet output, and visit it in a browser.
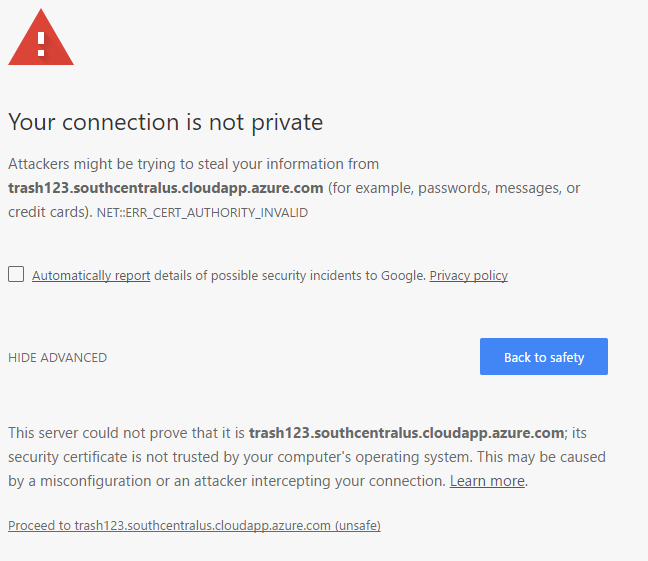
Uh oh! Don’t worry, this is expected. Since you didn’t specify a cert for the cluster, Key Vault generated a self-signed one for you. Accept the warnings and proceed. When prompted for a cert, select the one with your cluster’s name
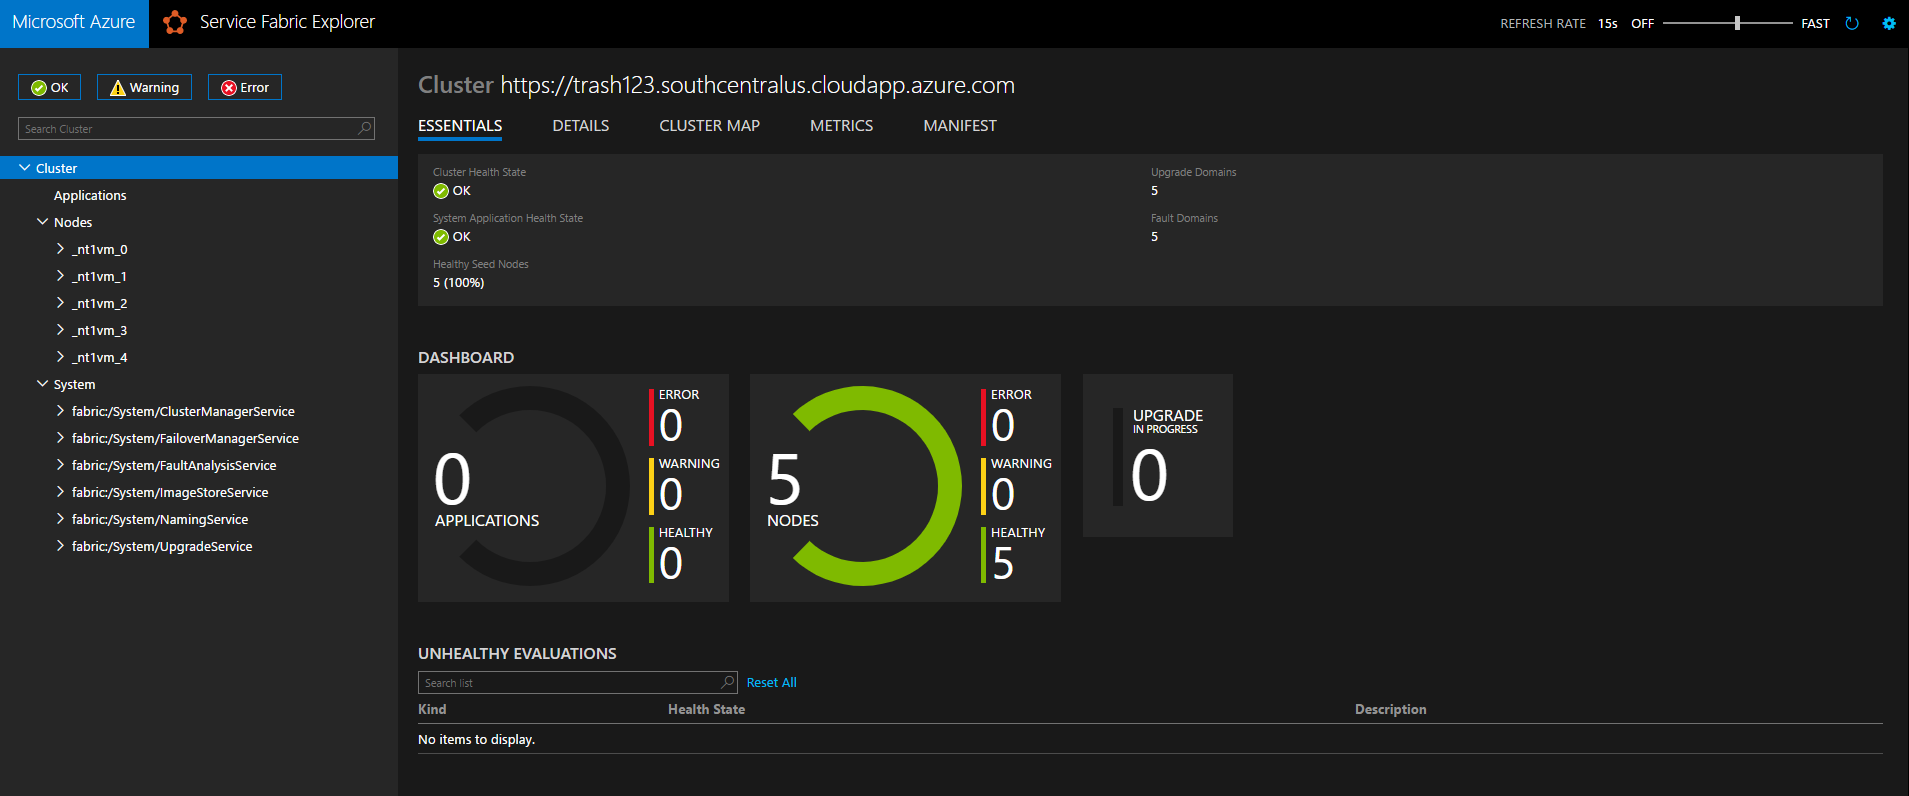
Great success! Expanding Nodes and System, you can see your five nodes and the various built-in services that Service Fabric uses to keep everything up and running. At this point, you’re ready to use Visual Studio, PowerShell, or the tool of your choice to deploy and manage applications on your secure cluster.
Cleaning up 🔗
To remove everything after you’re done, simply delete the Resource Group that was previously created
Remove-AzureRmResourceGroup -Name trash123 -Force