Azure has a plethora of APIs to interact with, and a lot of them have friendly wrappers via the Azure Portal, CLI or PowerShell cmdlets. But sometimes, I want to interact with services on a more detailed level, or try out newer API versions than the current tooling allows for.
Postman is an awesome tool for interacting directly with APIs. Unfortunately, dealing with authorization isn’t always straightforward. I’ve compiled some of my recent hacking around with the hope that it will save you some pain and help you get you started.
Note: Most Azure REST APIs use OAuth2, which is what I’ll focus on here. For other APIs (specifically Azure Storage), check the links at the end of of the post.
Prerequisites 🔗
I use Bash (on Windows) for everything these days. To follow along, you’ll want the following:
- Bash on Windows
- Azure CLI
- jq - This is a super handy command-line JSON processor (
sudo apt-get install jq)
Configure Azure Active Directory 🔗
First, we’ll need to set up an application and grant some permissions in AAD. I’ve created a script to help you out, because the configuration wasn’t immediately obvious (hence this post).
Create Service Principal via script 🔗
# Download script & mark as executable
curl -O https://gist.githubusercontent.com/noelbundick/1e1854b14c0a134de778345a6884a168/raw/c143e08128857632a9d566eadf2430adc04ff38c/createServicePrincipal.sh
chmod +x createServicePrincipal.sh

# Usage
./createServicePrincipal.sh NAME
Add Required Permissions in the Portal 🔗
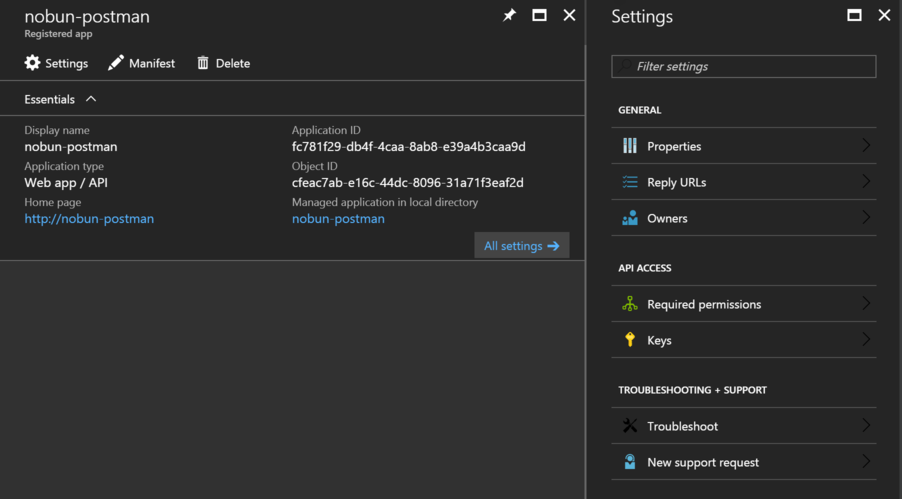
The app (Postman) needs some permissions to be able to access Azure on your behalf. I’m not sure how to update the application manifest automatically just yet, so I’m going to point you to the Portal. If you know how to do this in a script, please leave me a comment or ping me on Twitter. To save on navigation, the script will output the specific URL you need. Follow these steps:
1. Go to Required Permissions
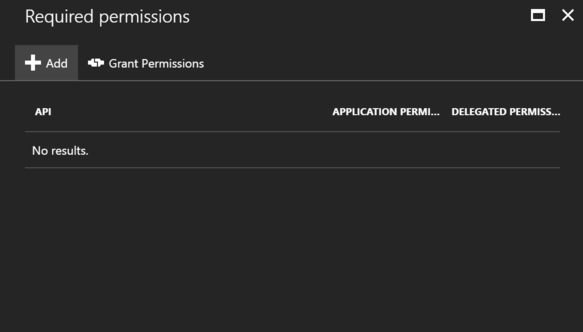
2. Add a Required Permission
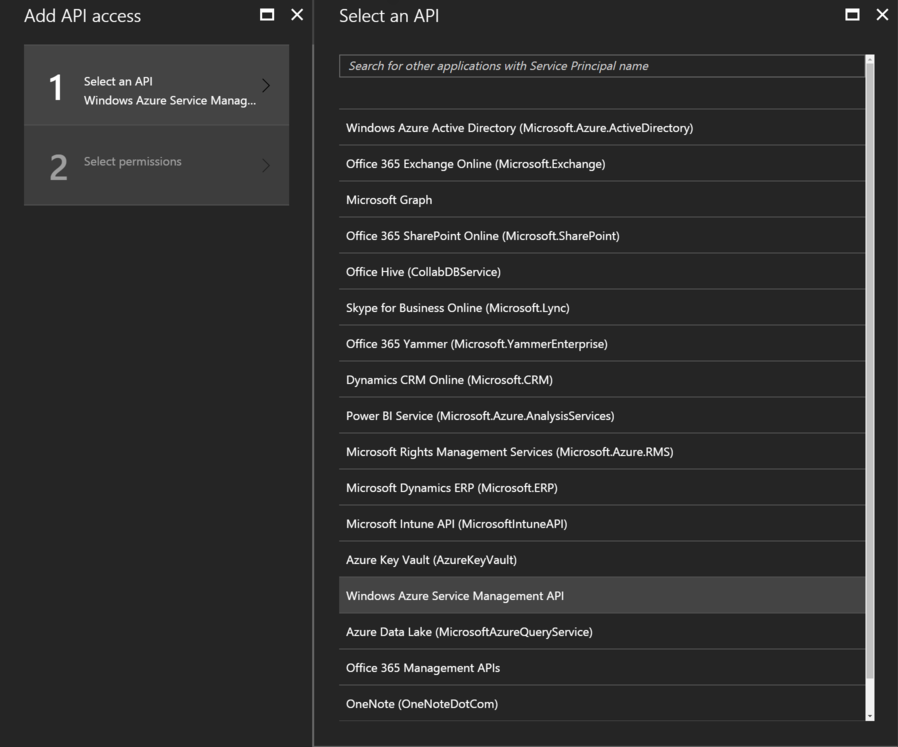
3. Select ‘Windows Azure Service Management API’
4. Select ‘Access Azure Service Management as organization users (preview)’
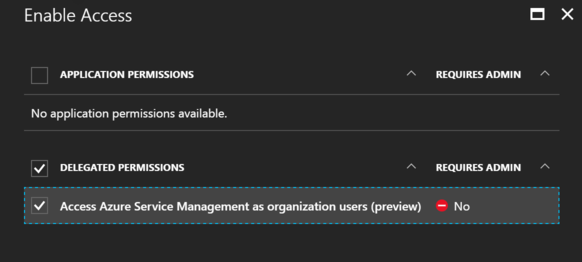
5. Done!
Configuring Postman 🔗
We’ll be using Postman’s native OAuth2 functionality here to get an OAuth token & attach it to our requests. The output from the previous script has all the info you need to configure Postman.
1. Visit the Authorization tab and select OAuth 2.0
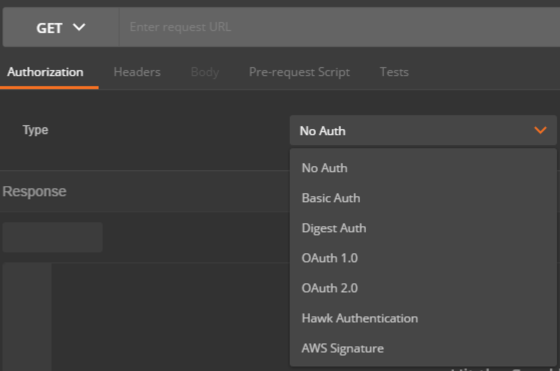
2. Hit Get New Access Token

3. Enter the values from the script output and make sure you’re using the Authorization Code grant type
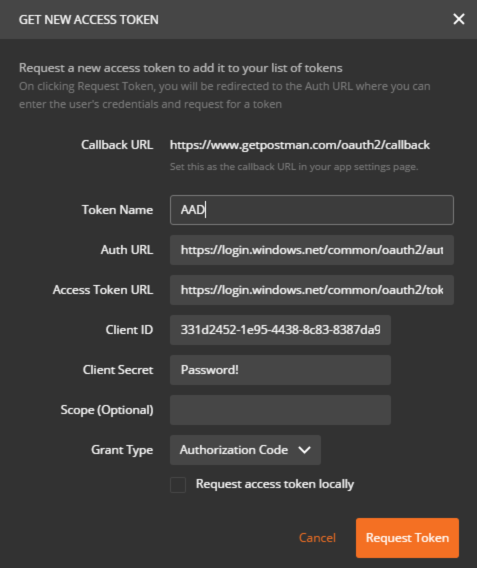
4. Request Token! You’ll be prompted to login with your credentials. On your first time, you’ll also need to authorize your app
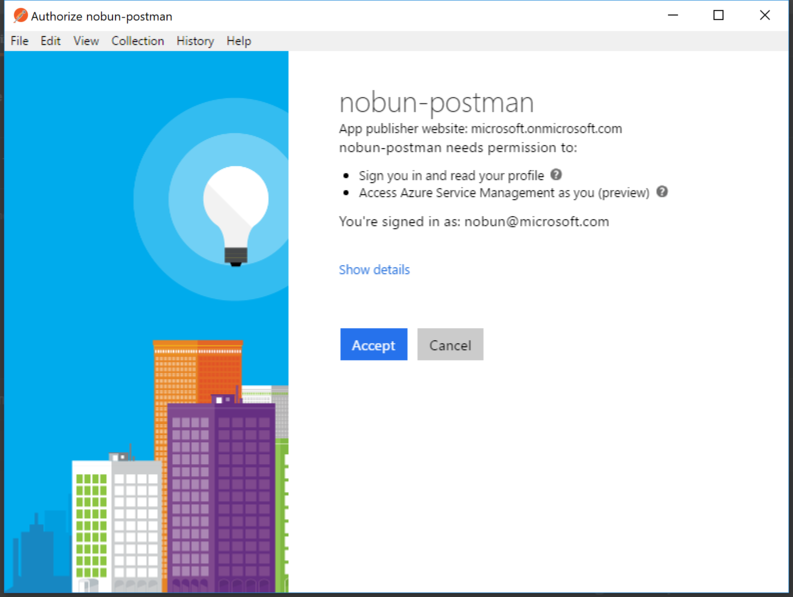
5. You’ll see a new token in your list of Existing Tokens. Select it & hit Use Token. This will set the Authorization header of your current request to use the Bearer token you just got from AAD

6. All done! You’ve got a proper Authorization header, and can now make requests against Azure Resource Manager. When your token expires, repeat steps 4 and 5 to get a new token.

Next steps 🔗
You should be able to modify this flow to work for lots of other services that use Azure AD. If you do, make sure you pay attention to a few things in particular:
- The Required Permissions for the application
- Ex - If you’re hitting Power BI, you’ll want to add it to the app in AAD
- The Auth URL and Access Token URLs
- Pay special attention to the
resourceparameter in the query string and make sure it lines up with your target service
- Pay special attention to the
References 🔗
There are a ton of cool things you can do with Postman - this only scratches the surface. These links were helpful for me, and are a great place to learn more. Thanks for reading!
- How to Use Azure Active Directory (AAD) Access Tokens in Postman - Use Postman environment variables with AAD tokens
- Using Postman Invoking Azure Resource Management APIs - A PowerShell-centric approach
- Generate Azure Storage SAS Tokens via Postman - Use the Pre-request Script sandbox to easily use the Azure Storage REST API